My chapel has a Rodgers 790C. It’s a good organ, and well suited to the space. But sometimes I want something with a larger variety of stops, or something with more reverb, or the ability to prepare my stop lists at home before I arrive at the chapel.
The organ has two crucial things:
- MIDI interface
- Auxiliary inputs
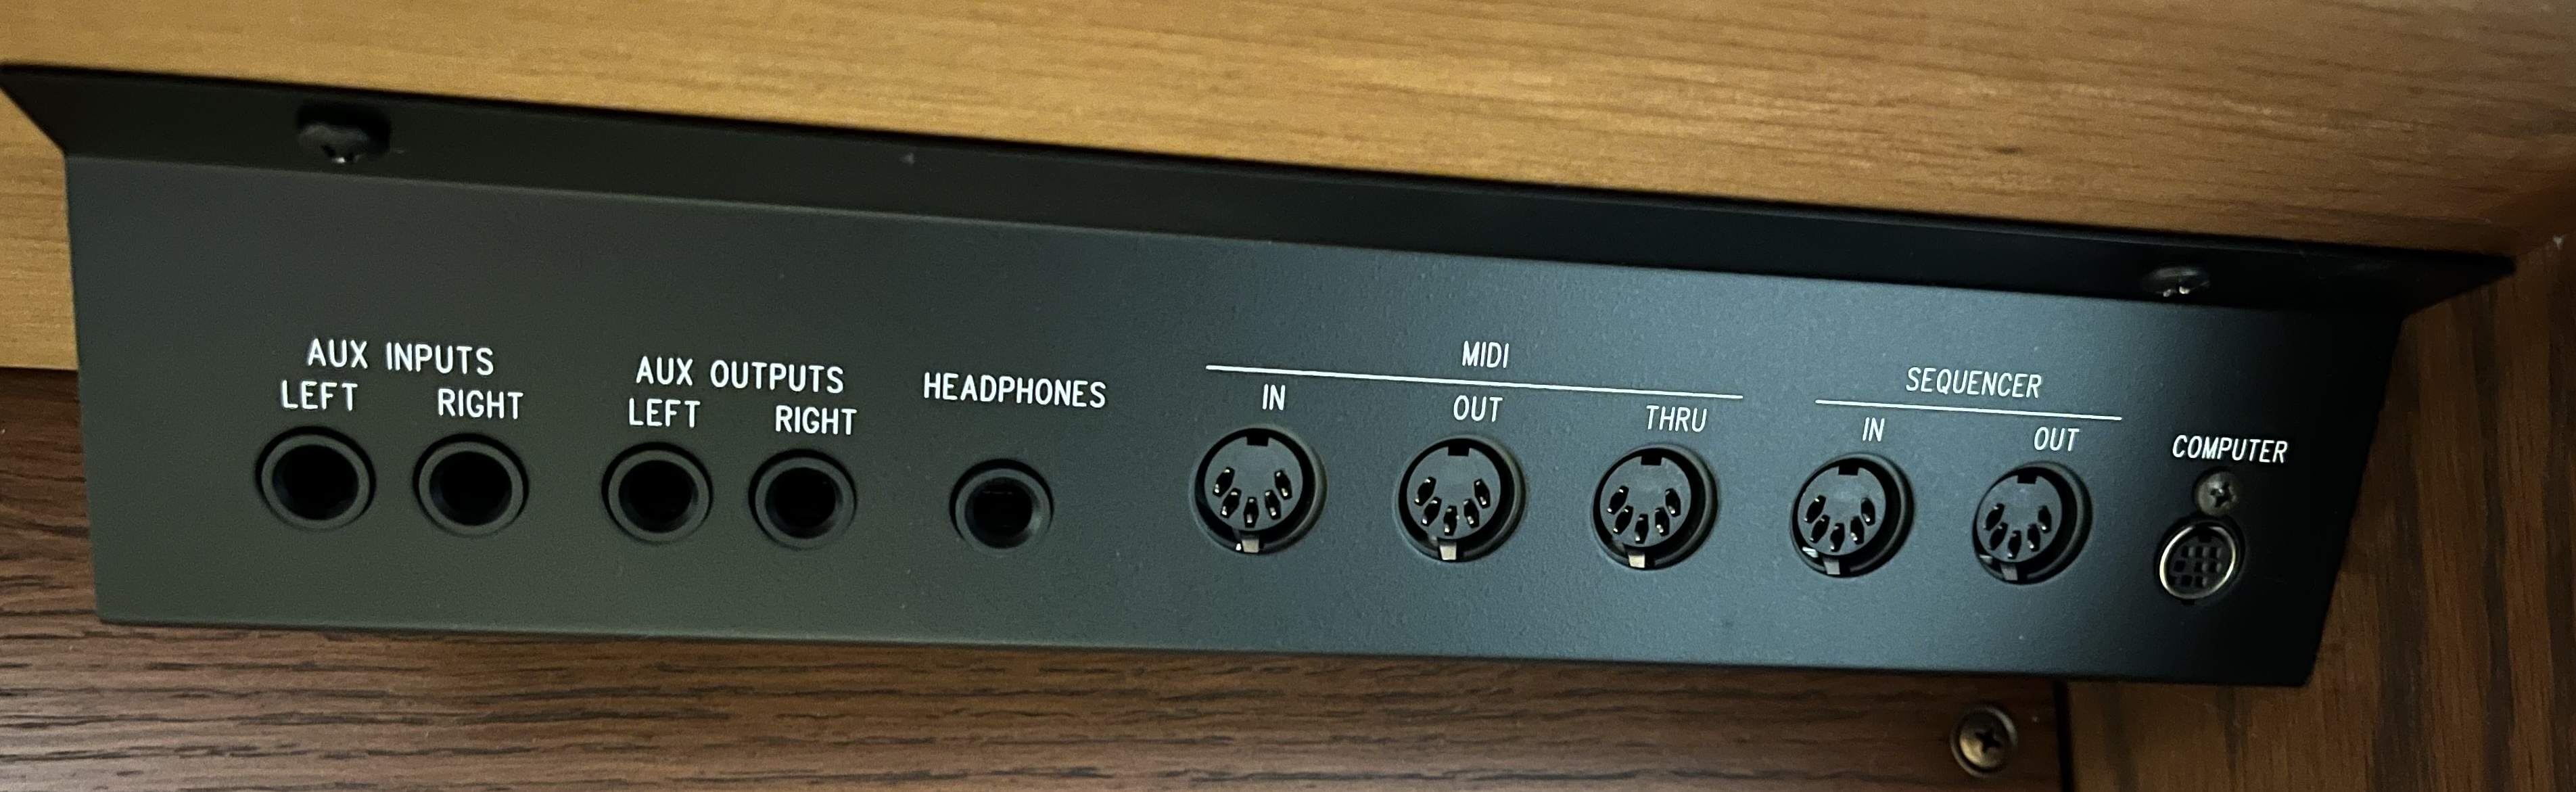
This means that we can replace or augment the sound of the organ with virtual pipe organ software, like Hauptwerk, GrandOrgue, or Organteq.
Overview
First, make the following connections:
- Connect the organ’s MIDI OUT port to your computer’s MIDI IN cable
- Connect your computer’s headphone jack to the organ’s AUX INPUTS jack
This is how it works:
- The organ sends MIDI signals to the computer for each note you play
- Virtual pipe organ software uses its audio samples for each of those notes
- You hear the virtual pipe organ audio through the regular organ speakers in the chapel
Because GrandOrgue is free and open source, it’s the software I prefer. This tutorial will explain how I use it.
What You’ll Need
- A computer with at least 8 GB RAM
- I’m using a 2020 M1 MacBook Air with 8 GB RAM. It’s fine, but not enough for some of the really large samplesets
- Virtual pipe organ software
- GrandOrgue is free and open source, and works fine for most of what you’ll need
- Hauptwerk is more user friendly: it’s better at recordning, setting/recalling combination pistons, and saving your configurations. But it also costs $13/month for a license.
- Many organ samplesets are available free of charge. Many others are paid.
- Organteq is also paid, but it needs very little RAM and offers a lot of per-rank customization
- MIDI-to-USB cable
- Preferably with both IN and OUT, but you need at least IN
- Here’s an example: https://www.amazon.com/dp/B09MTQ718H
- Headphone-to-¼" cable to connect your computer’s audio output to the AUX inputs on the organ
- Preferably a split cable with ¼" output for both left and right, but you need at least one
- Here’s an example: https://www.amazon.com/dp/B005HGM1D6
- Or perhaps a full-blown audio interface like a Scarlett Focusrite to give more control and reduce line noise, but a direct cable works fine for now
Detailed Instructions
1. Install GrandOrgue and get a sampleset
Do this at home–you’ll need several gigabytes of downloads.
You can use the default organ it comes with, or download another organ sample you like. Here are some samplesets I like.
2. Connect MIDI cables
Plug the MIDI cables into the organ before turning it on. Match computer IN to organ OUT, and vice versa.
Connect the USB end of the MIDI cable to the computer.
Turn on the organ.
3. Configure the MIDI mapping
Launch GrandOrgue.
Once the virtual organ is loaded, right click on the the Great manual to configure the MIDI settings. Click “Listen for Event” and then hit a key on the Great. It should populate the fields automatically with the right MIDI channel for that keyboard.
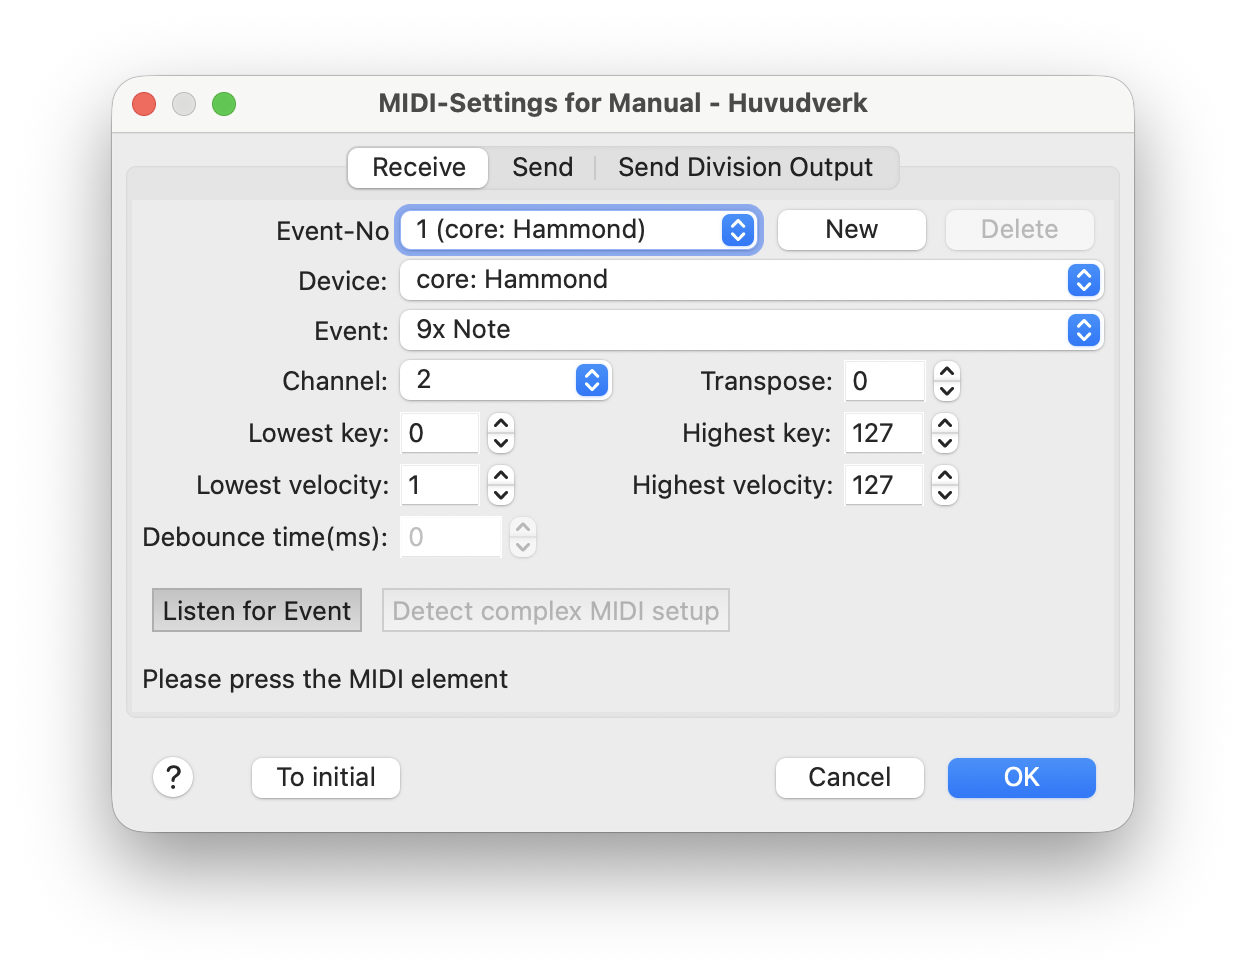
Map the swell manual and the pedals in the same manner.
Play a few keys on each and verify that the on-screen animation shows the keys being played on the proper keyboard.
Turn on a manual coupler on the Rodgers console and verify that it causes the proper keys to play on the coupled keyboard. For example:
- The swell-to-great coupler will cause the swell keys to light up when you play on the great
- The melody copuler will cause the right-most note on the great to play on the swell
- The bass coupler will cause the left-most note on the great to play on the pedal
4. Test the stops
Turn off all the Rodgers stops. No sound should come from the console.
Then, pull some stops in the VPO software. You should hear the pipes play from your computer speakers.
5. Connect the computer audio to the organ
Plug one end of the cable into the computer’s headphone jack.
Plug the other end(s) of the cable into the AUX INPUT jacks under the organ.
Verify that you hear sound coming from the chapel speakers when you play (although it may be soft).
6. Adjust the gain on the AUX inputs
Hold SET and twist the knob to the right of the LCD screen until you get to the screen with AUX settings, and the cursor is on the second line where the numbers are.
Spin the wheel to increase the AUX volume as high as it goes (about 6 dB).
Twist the knob to move the curosr up to the setting name, then spin the wheel until you come to Treble. Spin the wheel to increase the gain enough that you hear the treble properly at a good volume, but not so much that it becomes distorted.
You can look at the other gain settings and adjust them if necessary.
Note that these controls, together with your computer volume, are the only mechanism for controlling the volume of the VPO sound. The swell pedals on the console don’t affect it (unless you map them to an expression pedal in your VPO software).
Also note that the gain settings on the console reset whenever the console is powered off.
7. Experiment!
How you can layer Rodgers stops with VPO stops until you get a sound you like.
You can also try recording yourself with the audio recorder in GrandOrgue, or the voice notes app on your phone.